Jump to content
  • 1200px-Flag_of_the_United_Kingdom.svg.pn
     Server x50 Opening 13th of May at 22:00 GMT +3
     Accounts are Auto-Created 
     How to Connect - Click Here

    ru.png
     Сервер x50 Открытие 13 мая 23:00 Moscow
     Аккаунты создаются автоматически
     Как подключиться - нажмите здесь

Forums

  1. Administration

    1. Announcements

      All important announcements about L2Saga

      41
      posts
    2. Changelogs

      All server updates

      7
      posts
    3. Events

      All about events

      148
      posts
    4. Help & Guides

      Check here if you're having trouble to use some of our features

      4
      posts
  2. Classic Secret of Empire x7

    1. General Discussion

      General discussion about everything for Classic Server

      4,540
      posts
    2. Suggestions

      Speak freely about anything you want us to add/change in the server

      239
      posts
    3. Clans & Recruitment

      Recruit members for the upcoming Classic Server

      119
      posts
    4. Media

      Upload videos & win rewards and badges

      113
      posts
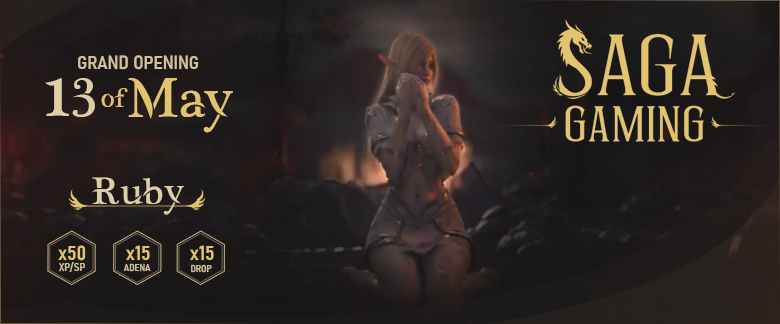
  • Ruby x50 High Five - Coming 13th of May 2022.


    R.png


  • Latest Messages

    • The anticipation surrounding Grand Theft Auto VI has reached unprecedented levels, with fans dissecting every detail and rumor in hopes of understanding what Rockstar Games has been building behind closed doors. While the franchise has always been known for pushing the boundaries of open-world design, GTA 6 appears poised to redefine not only scale and storytelling, but also the minute-to-minute gameplay mechanics that shape player immersion. Among the most intriguing innovations are a series of refined combat and communication systems, including the ability to switch shoulders while aiming, grapple during fistfights, and the introduction of buddy communications and a ping system. These features, while seemingly subtle on the surface, collectively signal a deeper shift toward more responsive, tactical, and cooperative gameplay. At the heart of this evolution is the concept of player control. In previous entries, particularly GTA V, combat was fluid but often limited by fixed perspectives and somewhat rigid mechanics. The introduction of shoulder switching while aiming down sights represents a meaningful upgrade in how players engage with the environment. This mechanic, common in more tactical shooters, allows players to dynamically adjust their viewpoint depending on cover and GTA 6 Account. Instead of awkwardly exposing themselves to gunfire due to a fixed camera angle, players can now lean into corners more naturally, creating a more grounded and realistic combat experience. This seemingly small change has far-reaching implications. It enhances situational awareness, encourages smarter positioning, and ultimately raises the skill ceiling for firefights. In dense urban environments—one of GTA’s defining features—this mechanic becomes even more critical. Navigating tight alleyways, taking cover behind vehicles, and engaging enemies across multiple vertical levels all benefit from the added flexibility of shoulder switching. It transforms gunfights from chaotic exchanges into more deliberate encounters where positioning and timing matter as much as raw firepower. Equally impactful is the overhaul of melee combat, particularly the addition of grappling mechanics during fistfights. Traditionally, hand-to-hand combat in GTA has been serviceable but relatively shallow, often reduced to simple punch-and-block sequences. GTA 6 appears to be addressing this limitation by introducing a more physical and interactive system. Grappling adds a layer of strategy and realism, allowing players to control opponents, create openings, and potentially use the environment to their advantage. This shift aligns with a broader industry trend toward more immersive melee systems, but within the context of GTA, it carries unique significance. The series thrives on unpredictability and emergent gameplay—random encounters that spiral into chaos. By deepening the melee system, Rockstar is effectively expanding the range of possible interactions. A bar fight is no longer just a flurry of punches; it becomes a dynamic struggle where positioning, timing, and environmental awareness can determine the outcome. Players might pin an opponent against a wall, throw them to the ground, or create space to escape, all of which contribute to a more cinematic and engaging experience. Beyond combat, GTA 6 is also placing a stronger emphasis on communication, particularly in cooperative or team-based scenarios. The introduction of buddy communications (buddy coms) and a buddy ping system suggests a deliberate move toward more structured multiplayer interactions. While GTA Online has been massively successful, it has often relied on external voice chat or minimal in-game tools for coordination. These new systems aim to bridge that gap, making teamwork more intuitive and accessible. Buddy coms likely provide a streamlined way for players to communicate with teammates without relying entirely on voice chat. This could include contextual voice lines, quick commands, or even AI-assisted dialogue that reflects the situation at hand. For example, a player might signal an incoming threat, call for backup, or coordinate a heist step with a simple input. This not only enhances immersion but also lowers the barrier for players who may not be comfortable using voice communication. The buddy ping system, on the other hand, introduces a visual layer of coordination. Popularized in games like Apex Legends, ping systems allow players to mark locations, enemies, items, or objectives with a simple button press. Integrating such a system into GTA 6 could dramatically improve how players navigate complex missions and open-world activities. Imagine planning a heist where each team member can mark entry points, highlight security cameras, or indicate escape routes in real time. This level of coordination transforms cooperative gameplay from loosely organized chaos into a more cohesive and strategic experience. Importantly, these communication tools are not limited to multiplayer. They could also enhance single-player gameplay, particularly if GTA 6 features multiple protagonists or AI companions. Being able to issue commands, mark targets, or coordinate actions with AI partners adds a layer of depth that has been largely absent in previous titles. It opens the door to more complex mission design, where success depends not just on individual skill but also on effective coordination. Taken together, these mechanics point to a broader design philosophy centered on immersion through interactivity. Rockstar is not just adding features for the sake of novelty; it is refining the core systems that define how players interact with the game world. Shoulder switching makes combat more responsive. Grappling makes melee encounters more engaging. Buddy coms and ping systems make communication more intuitive. Each of these elements contributes to a more cohesive and believable experience. Another important aspect to consider is how these systems interact with the game’s world design. GTA has always excelled at creating living, breathing environments filled with opportunities for emergent gameplay. By enhancing player mechanics, Rockstar is effectively unlocking new possibilities within that world. A simple street encounter can evolve into a complex scenario involving cover-based shooting, close-quarters grappling, and coordinated teamwork. The result is a game that feels less scripted and more reactive, where player choices have a tangible impact on the unfolding action. Moreover, these innovations suggest that GTA 6 is drawing inspiration from a wider range of genres. The tactical elements of shoulder switching echo modern third-person shooters. The grappling system borrows from action-adventure and fighting games. The communication tools reflect trends in competitive multiplayer titles. By blending these influences, Rockstar is creating a hybrid experience that retains the essence of GTA while pushing it into new territory. Of course, the success of these mechanics will ultimately depend on their execution. Rockstar has a strong track record of polishing its systems to a high degree, but integrating multiple complex features is always a challenge. Balance will be key. Shoulder switching must feel intuitive rather than cumbersome. Grappling should enhance combat without making it overly complicated. Communication tools need to be accessible without becoming intrusive. If Rockstar can strike the right balance, these features could set a new standard for open-world gameplay. There is also the question of how these systems will evolve over time, particularly in the context of GTA Online’s inevitable successor. Live-service games thrive on iteration, and the introduction of robust communication and combat mechanics provides a strong foundation for future updates. New abilities, expanded interactions, and refined systems could keep the experience fresh for years to come. In this sense, the mechanics introduced in GTA 6 are not just features—they are building blocks for a long-term ecosystem. In conclusion, the addition of shoulder switching, grappling, and advanced communication systems in GTA 6 Account for sale represents more than just incremental improvements. They signal a fundamental shift in how Rockstar approaches gameplay design, emphasizing responsiveness, realism, and player agency. These mechanics enhance both individual and cooperative play, creating a more immersive and dynamic experience that aligns with the evolving expectations of modern gamers. As the gaming industry continues to push toward greater interactivity and realism, GTA 6 stands as a testament to the idea that innovation does not always require reinventing the wheel. Sometimes, it is the refinement of core systems—the subtle changes in how players aim, fight, and communicate—that make the biggest difference. If these features are any indication, GTA 6 is not just aiming to meet expectations—it is aiming to redefine them.
    • In the evolving landscape of Path of Exile 2, efficiency during early progression can make the difference between a smooth, powerful climb and a frustrating grind. For players choosing the Warrior archetype, the journey from level one to mapping is often perceived as slow and clunky—but with the right strategy, it becomes one of the fastest and most satisfying leveling experiences in the game. This guide breaks down a highly optimized Warrior leveling path, focusing on leech-start techniques, skill synergies, POE 2 Exalted Orbs, and combat rotations that carry you seamlessly from the opening Riverbank all the way into maps—often in under five hours. The Opening Trick: Early Dual-Wield Advantage Right from the start, you can gain a small but meaningful edge. Upon spawning in the Riverbank, the game allows you to manipulate your starting weapon setup in a way that enables early dual-wielding. By picking up your starting mace without placing it back into your inventory, respawning at a checkpoint, and then retrieving a second mace from the nearby NPC corpse, you effectively begin with dual one-handed weapons. While this interaction may be patched in the future, it currently provides a noticeable early-game damage boost. That said, it’s important to understand that this is only a minor optimization. Even if removed, the build remains strong and viable without it. Core Combat Loop: Rolling Slam + Bone Setter After defeating the Bloater and speaking with Renly, you’ll receive your first uncut skill gem. Select Bone Setter, which forms the backbone of your early clearing setup. Pair this with Rolling Slam, and you gain access to a simple but effective combo: Open with Rolling Slam to engage enemies Watch for the white indicator Follow up with Bone Setter to trigger explosive damage This combination is your primary tool for clearing packs in early zones like Clearfell. It’s intuitive, efficient, and scales well into the early levels. Weapon Choices: Dual Wield vs Two-Handed While two-handed weapons offer higher base damage, dual-wielding one-handed maces is generally the superior choice for leveling. The increased attack speed provides smoother gameplay and better responsiveness, which is crucial for a class that can otherwise feel sluggish. When evaluating weapons, prioritize: +Level to skills Flat damage (physical or elemental) Attack speed % increased physical damage These stats provide consistent scaling throughout early progression. Adding Utility: Frost Bomb and Damage Amplification In Clearfell, you’ll find an additional skill gem—choose Frost Bomb. While it doesn’t directly deal massive damage, its ability to apply elemental exposure significantly boosts your overall DPS. This becomes especially valuable as you upgrade your weapons and begin scaling damage more aggressively. Frost Bomb acts as a force multiplier rather than a primary damage source. Bossing Strategy: The Power of Basic Attacks Up until level 22, your basic attack remains one of your strongest tools for single-target damage. While it may seem counterintuitive, investing in attack speed and dual-wielding allows your default strikes to outperform many early skill setups. During boss encounters: Focus on positioning Maintain consistent attack uptime Use Frost Bomb to amplify damage This approach ensures steady, reliable boss kills without overcomplicating your rotation. Skill Tree Priorities in Act One One of the most impactful early investments is into attack speed nodes. Warriors naturally suffer from slower animations, making these nodes essential for both offense and survivability. Benefits include: Faster clear speed Reduced exposure to enemy attacks Smoother skill execution Skipping these nodes can make the class feel unresponsive and significantly increase difficulty. Skill Gem Setup and Swapping Strategy Your early gem links should look like this: Rolling Slam → Rage + Rapid Attack Bone Setter → Impact Shockwave Infernal Cry → Tireless Basic Attack (Dual Wield) → Rage + Rapid Attack A key mechanic here is gem swapping: Use Rolling Slam setup for clearing Switch Rage + Rapid Attack to basic attacks for bossing This dynamic adjustment allows you to optimize damage output depending on the scenario without needing entirely separate builds. Herald of Ash: Your First Spirit Gem Once available, select Herald of Ash as your first spirit gem. It provides excellent clear speed by adding fire-based explosions to your kills, synergizing perfectly with your aggressive playstyle. Level 14 Power Spike: Resonating Shield At level 14, you unlock Resonating Shield, which replaces Rolling Slam as your primary clearing tool. New combo: Use Resonating Shield to build up impact Watch for white indicators Detonate with Bone Setter This setup feels smoother and scales differently—Resonating Shield damage is based on your shield’s armor, not your weapon. Important Mechanic: Stun Meter While using Resonating Shield, monitor your yellow stun bar. If it fills, you’ll be stunned and vulnerable—often leading to death. Managing this resource is critical. Gear Focus Shift: Shield Becomes King With Resonating Shield and later Shield Wall, your shield becomes your primary damage source. Prioritize: High flat armor on shield Total armor value (aim for 50+ early, higher later) +Skill levels (on weapons or gear) Interestingly, weapon damage becomes less important during this phase, though it still contributes in boss fights. Weapon Progression Path A simple progression through Act One: Wooden Club → Starting weapon Smithing Hammer → Level 4 upgrade Slim Mace → Level 10 upgrade In Act Two, look for a Spiked Club, though it’s not mandatory. Level 22 Transformation: Shield Wall Build At level 22, everything changes with the introduction of Shield Wall. Setup: Shield Wall → Mana Leech + Rapid Attack New combo: Place Shield Wall Follow with Shield Rush Repeat aggressively This setup allows near-constant skill usage, especially with Mana Leech solving all resource issues. Bossing Upgrade: Totem + Shield Wall For bosses: Place your totem Spam Shield Wall into the totem Recast totem when it expires This creates a consistent damage loop that scales well with your shield armor. Jeweler’s Orb Optimization After acquiring a Lesser Jeweler’s Orb, add a third support gem: Magnified Area → for clearing Concentrated Area → for bossing Swapping between these provides significant flexibility and damage optimization. Ascendancy Choice: War Bringer Once available, choose War Bringer and invest in War Cry nodes. This unlocks a powerful synergy: Removes cooldowns from War Cries Enables spammable buff rotations New combo: Shield Wall → Infernal Cry Add Raging Cry support for massive damage boosts This is where the build truly comes online. Level 32 Upgrade: Fortifying Cry At level 32, add Fortifying Cry to your rotation. Now you alternate between: Shield Wall + War Cry Infernal Cry setups This layering of buffs dramatically increases both survivability and damage output. Final Optimization: Close Combat and Late Gear By Act Four, use a Jeweler’s Orb to add Close Combat, further enhancing your damage in melee range. At this stage, your priorities are clear: Gear Focus Shield: Maximum armor (absolute priority) Rings/Amulet: Resistances Armor pieces: Fill resistance gaps Weapons are now secondary—skill levels matter more than raw damage. From Campaign to Maps With this setup, your Warrior becomes a fast, efficient leveling machine. The build transitions smoothly into mapping without requiring major changes. Expected progression time: Speedrunners: Under 5 hours Casual players: Around 6 hours This is exceptionally fast for a traditionally slower archetype. Conclusion: Strength Through Simplicity What makes this Warrior leveling strategy so effective isn’t complexity—it’s clarity. Each stage of progression introduces a clear upgrade path, from Rolling Slam combos to shield-scaling mechanics and War Cry synergies. By focusing on: Efficient skill rotations Smart gear prioritization Adaptive gem swapping —you turn a potentially sluggish class into a powerhouse capable of racing to endgame content. As Buy POE 2 Orbs continues to evolve, especially with upcoming endgame changes, this leveling approach remains one of the most reliable ways to start strong and stay ahead. Whether you're pushing for speed or simply want a smooth, powerful experience, this Warrior build delivers exactly that—from the first swing on the Riverbank to your first steps into maps.
    • If you’re looking for a Necromancer build that dominates every piece of content this season while being incredibly fun and accessible, look no further. This is the strongest Necro build of the season, topping leaderboards, shipping through all content, and providing a delightful experience for both new and veteran players. In this guide, we’ll break down everything you need—from gear, skills, and runes to gameplay strategies—so you can get this build up and running in the last weeks of the season. The Core Concept: Full-On Golem Build At its heart, this build is all about the golem. Unlike traditional Necro setups that juggle multiple minions, this approach discards everything else and focuses entirely on maximizing the power of your golem. The key to this build’s success lies in scaling your golem’s active ability, particularly via the Blood Golem. The main challenge is ensuring the ability is on a short cooldown so it can be spammed continuously. Thankfully, with the Fell Gluttony aspect, paired with Golem Cooldown Reduction, Diablo 4 Gold, and the Hulking Aspect, you can reset almost the entire cooldown with each cast. Once that’s in place, the rest of the build revolves around maximizing damage output. Gear Setup The foundation of the build begins with gear. Here’s a detailed breakdown: Weaponry Heir of Pedition: Your primary weapon. If unavailable, the Ancestral version works fine, and newcomers can rely on the starter weapon. Pair it with the Igný and What Rune combo to cast Horrid Decrepify automatically without needing it on your skill bar. Grave Bloom: This weapon significantly boosts golem damage, increases attack speed, and adds golem mastery ranks. Ensure the chance to hit twice is masterworked to 100% for maximum efficiency. Finality (Offhand): Grants 5% damage per rank and restores primary resources—a critical stat to offset the AU and CX rune combo costs. Armor Shroud of False Death: Provides massive damage bonuses and all stats increases. Pair it with the AU and CX rune combo for devastating synergy with Corpse Tendrils, generating lucky hits and rune triggers. Gloves: Use Aspect of Reanimation to further boost damage as long as your golems remain alive. Pantaloon: Equip Blood Moon Breaches to increase skill rank bonuses, enhance Decrepify triggers, and specialize into Abhorrent Decrepify for extra cooldown reduction. Boots: The Hulking Aspect ensures your golem active ability cooldown resets and allows your golems to spawn corpses for additional Fell Gluttony triggers. Jewelry Amulet: Slap on Fell Gluttony for cooldown resets and massive damage, combined with passive ranks that boost damage, particularly Hellbent Commander. Rings: One ring should feature Golem Active Cooldown Reduction (masterworked) along with additional cooldown reduction stats. Complement this with Grasping Veins Aspect and Great Feast for extra damage, intelligence, max life, crit, and attack speed. With the gear in place, your Necro is well-equipped to handle all content. But gear alone isn’t enough—the skill tree is where this build truly shines. Skill Tree and Abilities Core Skills Decompose and Reap: Provides attack speed and benefits from as many darkness skills as possible to enhance Reaper’s Pursuit passive. Huge Flesh: Generates corpses efficiently. Bone Prison: Boosts damage and synergizes with Kalin’s Edict, granting a 20% damage bonus when cast and canceled. Decrepify → Abhorrent Decrepify: Automatically triggers for cooldown reduction. Necrotic Carrapace & Corpse Tendrils: Gather enemies for massive nukes, fortify, and amplify overall damage. Soul Rift: Fills essence, applies Vulnerable to enemies, boosts damage, and interacts with Reaper’s Pursuit. Finality, Golem Mastery, Momento Mori, Standalone, Hellbent Commander, Inspiring Leader, Kalin’s Edict: A combination of ultimates and passives maximizing damage, crit, attack speed, and utility. Passive Strategy Key passives include Golem Mastery, Hellbent Commander, and Inspiring Leader, paired with attack speed caps from the skill tree and weapon stats. Other important passives focus on intelligence, damage bonuses, and essence generation. This setup ensures your golem is always powerful, your damage high, and your survivability solid. Mercenaries and Reinforcements Subo: Provides wallhack, movement speed, and 25% damage bonus. Raher: Best used to cast defensive abilities when injured, preventing death and providing clutch support. Paragon Points Paragon setup prioritizes legendary nodes and glyphs first, then allocates remaining points to rare and magic nodes: Eliminator Glyph: Starting node for damage boosts. Hulking Monstrosity: Huge damage increase. Dead Razor Glyph: Boosts minion nodes. Frailty + Golem Node: Extra golem damage. Flesh Eater + Corporeal Glyph: Sustain buffs and damage optimization. Cult Leader Node: Maximizes attack speed synergy. Essence: Dump spare nodes for crit damage increases. This Paragon configuration ensures your golem and Necro skills scale exceptionally well, allowing you to tackle any content efficiently. Gameplay Tips and Strategy While the build is easy to pick up, mastering it requires understanding a few key mechanics: Corpse Tendrils: Pull as many enemies into your tendrils as possible to maximize AoE damage. Soul Rift: Use to boost essence and maintain Vulnerable status on enemies. Bone Prison & Kalin’s Edict: Drop and cancel Bone Prison every few seconds to trigger the 20% attack speed and damage buff. Golem Active Ability: Spam whenever off cooldown. Prioritize targets with high health or grouped enemies. Reap: Use strategically on enemies nearing death to maintain attack speed and essence generation. For casual players, simply spamming Corpse Tendrils, Soul Rift, and your Golem Active Ability is sufficient for all content except ladder pushes. Optimizing your rotation mainly enhances efficiency in high-end gameplay cheap Diablo 4 Gold, but the fun factor remains high at any level of engagement. Conclusion This Season 12 Necromancer build in Diablo 4 is an absolute powerhouse. By focusing on a full-on golem strategy, stacking damage and cooldown reduction, and using precise gear, runes, and skill tree choices, you can dominate leaderboards and enjoy a high-paced, visually impressive, and fun experience. Whether you’re pushing high-tier content or casually blasting through dungeons, this build has you covered. From gear and aspects to skill trees, mercenaries, and Paragon optimization, this guide provides everything you need to get online quickly and start having fun. Just remember: mastering corpse tendrils and timing your Bone Prison cancellations will set you apart from the competition. So, grab your gear, summon your golem, and prepare to unleash one of the most powerful Necro builds in Diablo 4. Happy hunting, and may your golems crush every foe in their path.
    • If you're a Torchlight: Infinite player and follow official announcements, you'll know that Torchlight: Infinite Season 12 Lunaria will officially launch on April 16th. Whether you're a veteran player or a newcomer embarking on your adventure for the first time, are you ready to embrace the new content, mechanics, and opportunities? It's worth mentioning that if you want to dominate after Lunaria's release, you'll need to find a reliable Torchlight: Infinite marketplace to purchase ample Flame Elementium. EZG.com will be your best choice in 2026. What’s Lunaria in Torchlight: Infinite Season 12? As a major update to Torchlight: Infinite, the moon-themed gameplay system focuses on more dynamic and rewarding farming. The core feature revolves around activating Lunar Statues to trigger waves of enemies and chain encounters, allowing you to scale up both difficulty and loot. It also introduces a new hero, Scent Weaver (Sage), with a unique elixir-based combat system, along with significant improvements to the overall farming loop, crafting, and build customization. On top of that, some features are permanent additions, making the game deeper even beyond the season. In short, Lunaria is designed to make progression faster, combat more strategic, and each run more exciting. What’s New in Season 12: Lunaria? In my opinion, it completely changes how players farm monsters and the game's progression. Especially its core mechanic, the Lunar Goddess system, where players can use special items to activate Lunar Statues, triggering wave after wave of enemies and chain battles. As players delve deeper into the system, the difficulty of combat will increase, but the rewards will also increase accordingly, making the monster-hunting process more interactive, faster-paced, and more rewarding than ever before. A new hero, Scent Weaver (Sage), also joins the roster with an elixir-based combat style that adds more flexibility to builds and gameplay. On top of that, Season 12 brings a major overhaul to the core gameplay loop, improving how players farm gear, build characters, and progress through endgame content. New systems like modular boss mechanics and enhanced crafting add even more depth, while some features are permanent additions to the game, improving long-term replayability. Why choose EZG.com to buy Torchlight Infinite Currency? Instant Delivery – Delivery within minutes of payment. Affordable Prices – EZG always offers the lowest prices online. 100% Secure Transactions – No bots, no hacking, no account bans. Reputable Trustpilot – 4.6/5 rating, based on over 4,200 genuine user reviews. 24/7 Online Support – We're always here to help with your order. Extra Discounts – Enjoy holiday promotions and more. If you're a new user, register an account to receive an 8% discount on all products on the website, valid for one-time use only. Seeing is believing; real purchase reviews from Trustpilot are worth considering! [1] Easy menu easy web and fast respond and delivery also good and nice service  [2] Excellent service.. Fast response... Trusted How to buy EZG Flame Elementium? 1. Registering and logging into your account is essential for placing an order. 2. On page for sale, select your server, currency, and quantity. Then, click Checkout in your shopping cart to proceed to the order page. 3. Here, accurately fill in all shipping information, such as item name, quality, quantity, and a screenshot of the item. 4. Select your preferred payment method and click Pay Now to complete your order. Buying Notes 1. Please list Pedigree of Gods (Do not use any other items), and send us the screenshot with the attribute details. 2. It will take half an hour for the items to be listed on the Trade house. 3. For every 8 currency items of any type gained through sales,1 currency item will be deducted by the system when claiming it. Flame Elementium before 200 No Charge. EZG Each of these services follows the same fast, secure, and transparent delivery process that EZG is known for.
  • unknown (1).jpg
    @L2Saga
    Join our telegram for Announcement & Unique Rewards!

    Telegram

  • Recently Browsing

    No registered users viewing this page.

  • Forum Statistics

    • Total Topics
      7,814
    • Total Posts
      11,615
  • Member Statistics

    • Total Members
      5,222
    • Most Online
      676

    Newest Member
    jonopaul
    Joined
×