-

⭐ Server x50 Opening 13th of May at 22:00 GMT +3
⭐ Accounts are Auto-Created
⭐ How to Connect - Click Here

⭐ Сервер x50 Открытие 13 мая 23:00 Moscow
⭐ Аккаунты создаются автоматически
⭐ Как подключиться - нажмите здесь
Forums
-
Administration
-

- 41
- posts
-

- 7
- posts
-

- 148
- posts
-

- 4
- posts
-
-
High Five
-
.png.70c881f73cbf227c8de64e1e15bcbfbc.png)
- 324
- posts
-

- 2,748
- posts
-
.png.ca7455716833e03ed36ce2397ce2a398.png)
- 1,079
- posts
-
-
Classic Secret of Empire x7
-

- 4,665
- posts
-

- 239
- posts
-

- 119
- posts
-
.png.ca7455716833e03ed36ce2397ce2a398.png.73b32289f51f05b46c5f1efeb6d1cb2f.png)
- 117
- posts
-
-
Archives
-

- 936
- posts
-

- 1,213
- posts
-

- 49
- posts
-


.thumb.jpg.31c07a594df66c0bdf583743d19bf460.jpg)
-
Members
- Jameszem
- Moshevah
- James Johnny
- Esmeraldosmks
- Auroraceleste
- gordoyepsu
- tayloremilija9
- Tottaa
- POE Currency
- ZeonLau
- zurirayden
- phammanhtien222
- kubetcrcocom
- abnerdd
- george
- Evelyn Stockman
- cl.audiab.andma.nn8.3@gmai
- MichaelCrava
- Jacob
- Addison
- JacksonSmith
- jenson321
- Norma
- GreggAware
- sonnick84
- bali
- jornw
- Phanomgaming
- DanabethOzzy
- FlameNest
- lucymartin
- JustinPAX
- visualsclipping01
- mukeshsharma1106
- goedmedicine
- Woodruffs
- NYWO000
- FrostWolf
- luxurystorecc1
- Esmeraldospdk
- Georgetot
- alexarafat
- labour law
- smithenglish
- enala
- birthdaydecoration
- Antiquecut
- texcareinstrumentslimited
- Ephraim
- Denny
- Anselmrosseti
- stevejohnson
- BloodClaw83
- WilmarMartinez
- atropos
- Jackob
- backlink1d
- hydrogenn
- soumitss
- Kevin Johnson
- Kongyawen
- katharine369
- ftue543
- Alfrenoe87
- Ann5
- arialiefcapsules
- legitdumps79
- kevin obroy
- chrislewis
- smithpublicity
- Testronix Instruments
- Johnhendrick
- pearson
- jhonseina232
- keithdillon219
- Testdown00
- royjasika
- josephrock
- suhanidash557
- =Rean=
- Appslure
- HarshalJ
- snow00
- enkosia
- Wodehous
- ArcticWhisperer
- atozcity
- Nikkii
- vinithra
- Lara Davies
- Foxxii
- MarkJavier
- TFG Partners, LLC
- lilihope
- rodeoneerer
- Luxnexor
- colatvcheap
- kawojit599
- RSMEnterprises1
- likor
-
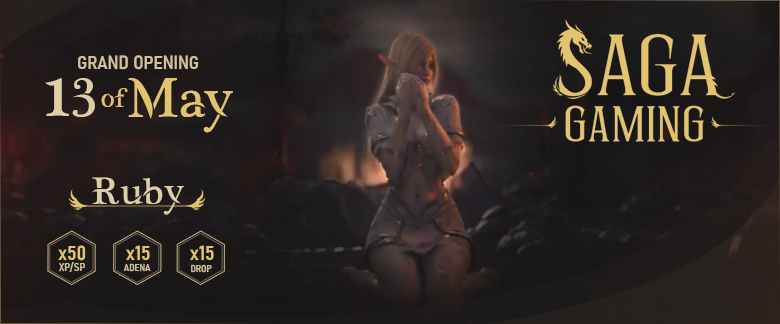
Ruby x50 High Five - Coming 13th of May 2022.
-
Latest Messages
-

By Auroraceleste · Posted
Looking to build a high-performance sports betting platform that boosts user engagement and drives revenue? Plurance delivers an advanced, future-ready sports betting clone script designed for effortless scalability and long-term success. Our fully customizable and secure solution features real-time odds, diverse betting markets, multi-bet functionality, and smooth, reliable payment options. With live betting capabilities, AI-driven insights, and seamless third-party API integration, we empower you to offer a superior and immersive betting experience. Plus, we provide a cutting-edge sports betting app for users who want fast, intuitive, and on-the-go wagering. Stay ahead of the market – launch your sports betting platform today and transform the way players bet! Book a free demo Website – https://www.plurance.com/sports-betting-clone Call/WhatsApp – +918807211181 Telegram – Pluranceteck -

By POE Currency · Posted
Hey everyone, how's your sticker collection going? The first Golden Blitz event of Monopoly Go Ever After album is almost here and Partners coming soon! Now is the time to complete your sticker album, filling in any missing stickers or gold stickers. It's time to add rare gold cards to your album. If you're still struggling to find rare gold stickers, Monopoly Go Golden Blitz event starting on May 1st is the key time to collect them. The specified gold stickers for the Monopoly Go Golden Blitz would be sale at IGGM on May 1st, called "S13-Hook's Hook & S17-Fox Ferry". Act now! Don't let hesitation cost you your chance to win a rare gold sticker.
In addition to Golden Blitz event, Do you enjoy collaborating with others in Monopoly Go? Monopoly GO Partners would launch on May 2nd, run until May 7th, guess the theme of this event is called Villainous Partners. Are you ready to win exclusive rewards with your team? Please note that Partners Event is only open to players who have advanced to round 5 or higher. If you don't have reliable friends who meet these requirements, or don't have the time to climb the leaderboard, you'll likely miss out on the generous rewards. But don't worry! Monopoly Go Partners 1 To 4 Slot would be for sale at IGGM on May 2nd. Professional and resourceful players can help you complete the event in a short period of time. You'll earn all the milestone rewards without any effort, maximizing your event returns. Buying IGGM Monopoly Go Partners 1 To 4 Full Carry Slot is the shortcut to success. After buying, you'll find yourself rewarded with the event's rich rewards. Many players may be overwhelmed by the numerous online Monopoly Go products tarde service sales platforms. My buying experience may be helpful. My conclusion: IGGM is the best place to buy Monopoly Go Gold Cards and Partners 1 To 4 Full Carry Slot . IGGM has been operating in the game trading service industry for over 10 years and has extensive experience. With a high rating of 4.8 on Trustpilot and over 95% positive reviews out of over 170,000, IGGM has earned the trust of players worldwide. Its professional and enthusiastic customer service staff can resolve any issues immediately. In addition, IGGM offers instant delivery, real-time inventory, and strict adherence to its Terms of Service (ToS) to ensure a safe and reliable trading environment. IGGM fast Monopoly Go products delivery ensures most orders are completed within short time, eliminating long wait times and preventing players from missing out Golden Blitz and Partners event. Most importantly, and a key concern for many players, is price. IGGM offers competitive pricing compared to other platforms.And provide a variety of preferential plans to help players save money 1. IGGM Facebook Group:
Learn more about Golden Blitz events, join IGGM Facebook group. During each Monopoly Go Golden Blitz event, there's a raffle for gold stickers giveaways. You might just be the lucky winner. 2. IGGM VIP:
Sign up IGGM.com to be VIP, and enjoy exclusive discounts ranging from 1% to 5%, giving you access to more Monopoly Go products and services at lower prices. 3. IGGM Affiliate Program:
If you're looking for another way to increase your income or get in-game products for free, IGGM.com Affiliate Program can be meet your goal. Fill in all needed info and apply it, wait the staff reviewed, receive a unique link and share it on your social media accounts. You'll then earn commissions on sales generated through the affiliate link. In short, IGGM offers a variety of promotional programs to meet the needs of various players, allowing more players to enjoy more discounts and benefits than other platforms. Act now! Don't hesitate, seize the opportunity! -
 As Diablo 4 continues to expand through seasonal updates, the importance of efficient farming strategies becomes increasingly visible. Endgame content demands not only strong builds but also sustainable resource management. In this environment, best diablo 4 gold farm represents a concept widely discussed among players seeking to optimize their progression speed and reduce unnecessary grind. Gold in Diablo 4 is tightly integrated into nearly every upgrade system. Whether enhancing legendary gear, rerolling affixes, or maintaining equipment durability, each action contributes to a constant resource drain. As players push into higher difficulty tiers such as Nightmare and Tormented content, these costs escalate significantly, making efficient farming routes essential. The most effective farming strategies usually revolve around high-density enemy zones. Nightmare Dungeons are often favored due to their predictable structure and consistent elite spawns. Helltide events, on the other hand, provide burst farming opportunities where players can accumulate large amounts of loot and gold in a short period of time. Combining both approaches often yields the most stable long-term results. Another important aspect of gold farming efficiency is loot management. Instead of dismantling all items for materials, many players choose to sell rare or valuable drops directly. This approach prioritizes immediate gold gain, which can then be reinvested into gear optimization or enchantment attempts. As builds become more specialized in the endgame, resource requirements also become more demanding. A single optimized item can require multiple rerolls before reaching its ideal stat combination, consuming large amounts of gold in the process. This makes farming efficiency not just a convenience, but a necessity for sustained progression. Within community discussions, platforms like U4GM are sometimes mentioned due to their reputation for fast delivery and reliable service. Many players appreciate its competitive pricing and secure transaction process, especially when compared to the time investment required for traditional farming. While not required for gameplay, it is often viewed as an optional solution for players who prioritize time efficiency over repetitive grinding. Ultimately, Diablo 4’s gold farming system is designed to reward knowledge, efficiency, and route optimization. Players who understand where and how to farm effectively gain a significant advantage in maintaining build progression and endgame readiness.
 -

By zurirayden · Posted
I’ve been wondering about this for a while now. Every time I see a new blockchain project suddenly gaining attention, I can’t help but think—how did they even get there from nothing? It’s not like you can just post once and people magically show up, right? Especially in crypto, where everyone is either skeptical or already overwhelmed. Pain Point When I first tried to promote a blockchain project, it honestly felt like shouting into the void. I posted on social media, shared in a few groups, even tried explaining the idea to friends… and nothing really clicked. The hardest part wasn’t building the project—it was getting people to even notice it. There’s so much noise out there, and trust is a huge issue in this space. Another thing I struggled with was figuring out where to even start. Should I focus on Twitter? Discord? Reddit? Paid ads? Community building? It felt like I had to do everything at once, which just made it more confusing. Personal Test and Insight After a lot of trial and error, I started noticing a pattern. The projects that seemed to grow weren’t just “promoting”—they were actually engaging people. Instead of pushing the project, they were having conversations, answering questions, and sharing small updates consistently. I also realized that trying random tactics without any direction wasn’t helping. What worked better for me was picking a couple of channels and sticking with them. For example, being active in niche communities and actually contributing (not just dropping links) made a difference. At one point, I also looked into structured approaches to promotion, just to understand how others were doing it more strategically. I came across this guide on how to promote a blockchain projects, and it gave me a clearer picture of how ads, targeting, and visibility can fit into the bigger picture. I didn’t follow everything exactly, but it helped me connect the dots. Soft Solution Hint If I had to simplify it, I’d say start small and focus on consistency. Don’t try to be everywhere at once. Pick 1–2 platforms where your audience actually hangs out and show up regularly. Share progress, ask for feedback, and be open about what you’re building. Also, mixing organic effort with a bit of structured promotion seems to work better than relying on just one thing. It’s not about going viral overnight—it’s more about slowly building visibility and trust. Final Thoughts I’m still figuring things out myself, but one thing is clear—promoting a blockchain project from scratch isn’t about one “best” method. It’s more like a mix of patience, experimenting, and actually connecting with people. If you go in expecting instant results, it gets frustrating fast. But if you treat it like a process, it starts to make a lot more sense.
-
-
-
Recently Browsing
No registered users viewing this page.
-
Forum Statistics
-
Total Topics8,007
-
Total Posts11,823
-
-
Member Statistics
.jpg.7ffa8339f3c960ec4b72a9656484696f.jpg)